
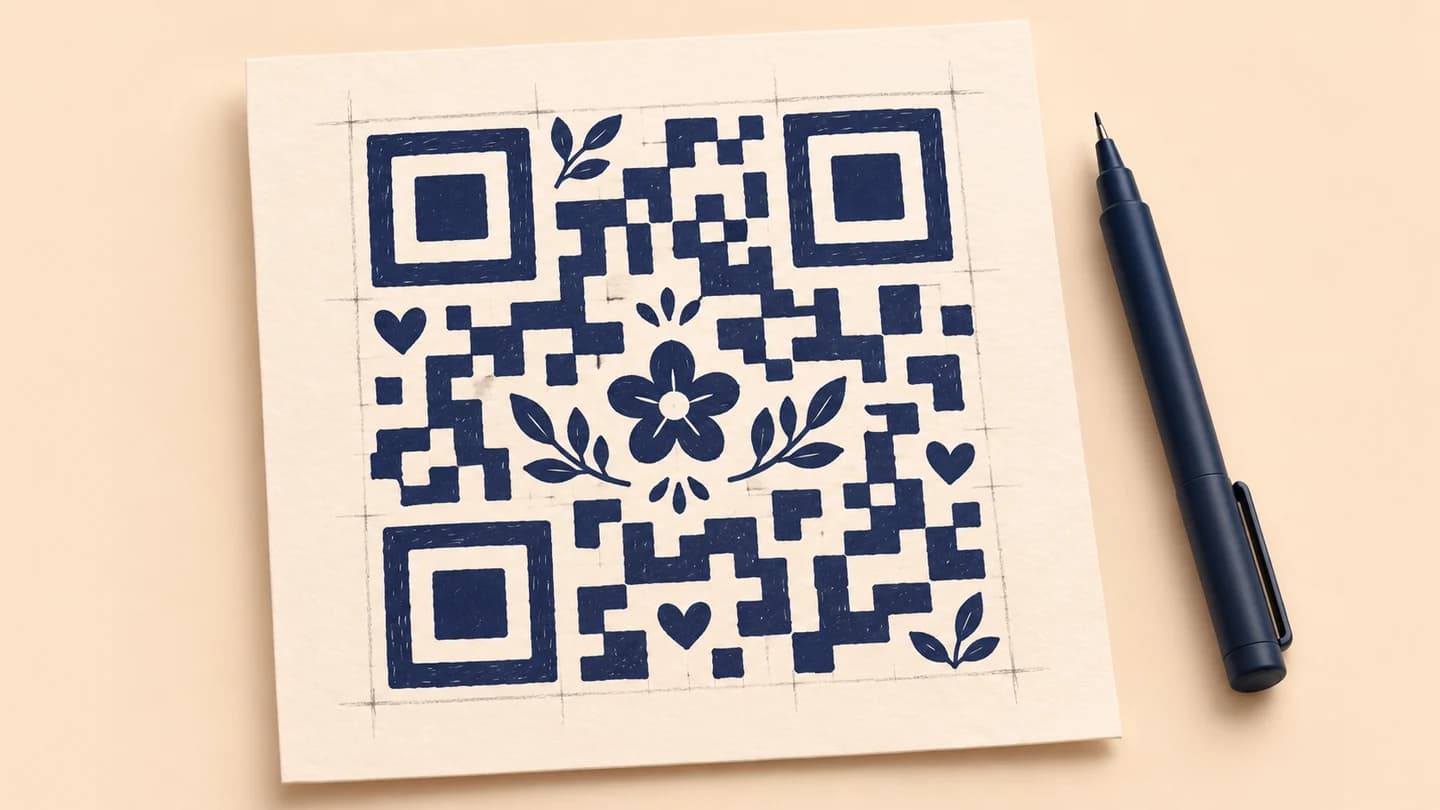
A handmade QR code can work when you faithfully copy a valid generated pattern onto paper or another material. Start with a real QR image, preserve its square grid and clear border, and verify the finished object. Drawing three corner markers around an invented arrangement of squares does not encode your link.
Use the CraftMyQR generator to create your own destination. For practice, this guide includes an exact numbered reference and a blank worksheet for a code that opens CraftMyQR. You will also learn how to check rows, calculate the complete drawing area, and diagnose a failed copy. The decoding results below come from a documented digital experiment; they do not claim physical handwriting or phone-camera testing.
Download the Handmade QR Code Practice Sheets
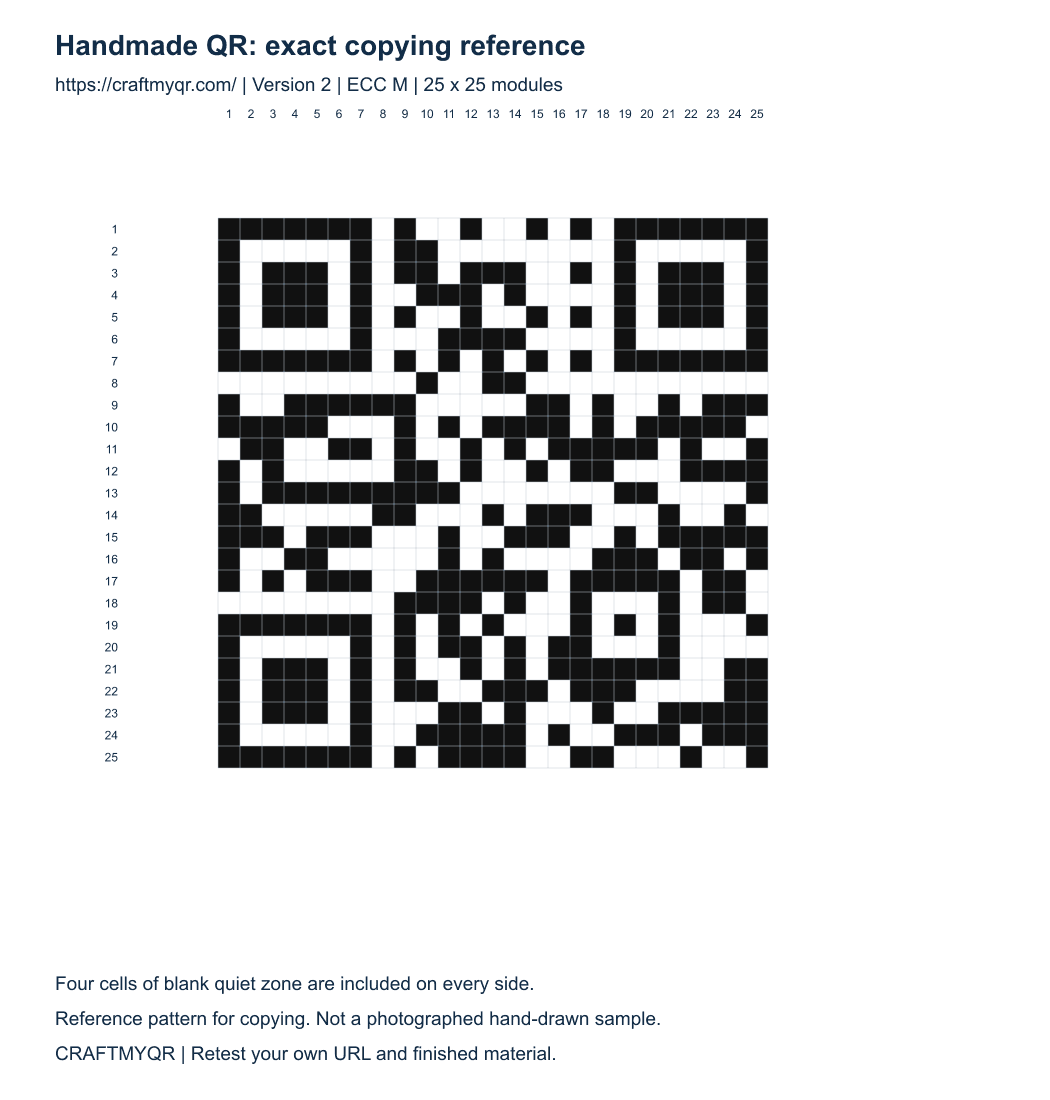
Open the numbered reference PNG and the blank numbered worksheet PNG. Save the original images rather than copying their smaller article previews.


The reference has 25 rows and 25 columns in its core, with four blank module-widths around every side. Its complete area is therefore 33 by 33 modules. The 625 core cells include 330 dark cells in this exact pattern. Those counts provide cross-checks, but matching the total alone cannot prove a correct copy.
These worksheets encode one specific destination. To make a gift, label, or school project that opens your own page, generate a new pattern and copy that pattern instead. Never draw your URL underneath the sample and assume the squares have changed.
Prepare a Handmade QR Code Template
Choose a short, durable destination. Avoid a session-specific address, an editor preview, or a link whose permissions prevent visitors from opening it. A shorter payload can reduce the module count, though character set and error correction also affect the result.
For the practice QR template, we used qrcode 1.5.4 with the exact string https://craftmyqr.com/, error correction M, and automatic version selection. It produced Version 2 with a 25-module core. The current public generator uses its own settings; its export of the same URL may produce a different valid grid. Copy one approved reference from start to finish rather than mixing patterns from separate exports.
Keep your original digital file. If a drawing later stops scanning, that file lets you compare coordinates and distinguish a copying mistake from poor photography, curled paper, or an unavailable destination.
Calculate the Complete Drawing Size
A QR module is one small dark or light cell. For standard QR codes, DENSO WAVE specifies a four-module clear margin on every side. That margin is the quiet zone; it is functional space around the drawing.
Use this calculation for a handmade QR code:
complete width = (core modules + 8) × chosen cell width
For our 25-module practice core:
These are geometric calculations, not guaranteed scan sizes. A 99 mm practice square may be comfortable to reproduce on paper, but your marker width, surface, camera, lighting, and intended distance still determine whether the finished piece is useful.
If you use a different QR template, count its actual core modules and recalculate. Do not reuse the 33-module total for a denser symbol. The minimum-size lab guide explains why payload density changes the problem.
| Cell width | Core width | Quiet zone on each side | Complete square |
|---|---|---|---|
| 2 mm | 50 mm | 8 mm | 66 mm |
| 3 mm | 75 mm | 12 mm | 99 mm |
| 4 mm | 100 mm | 16 mm | 132 mm |
1. Establish a square grid
Use graph paper or faint pencil guides on a flat, light surface. Number core rows from top to bottom and columns from left to right. Reserve the quiet zone before drawing so you do not run out of room at the edges.
If the worksheet is resized during printing, its coordinates remain useful, but the physical cell width changes. Measure your printed grid before choosing a pen. Labels and decorative borders belong outside the full quiet zone.
2. Transfer the structural patterns carefully
Copy the three large finder patterns, their light separators, timing patterns, and every other cell exactly as the reference shows. Do not redraw them from memory. A hand-drawn QR code contains functional structures beyond the three recognizable corners.
Keep each dark cell filled to its intended boundaries without spreading into adjacent light cells. Work on a sample of the same material first to see whether the ink feathers or the marker makes adjacent cells merge.
3. Work in short, checked rows
Copy one row or a small group, then compare it with the reference. Keep a removable pointer beside the current row. Shift the pointer instead of drawing heavy progress lines through the code.
For a larger handmade QR code, a second person can read coordinates while you check the copy. Record the last verified row so a break does not cause a one-row shift that affects the rest of the drawing.
Check Black Runs, Not Just Individual Squares
A black run is a continuous group of filled columns in one row. Reading runs reduces repeated counting when checking a hand-drawn QR code. Our first three rows are:
Columns 1–7 means fill all seven cells, not just its endpoints. Check both the ranges and the spaces between them. Row counts are a quick warning, but two wrong cells can cancel each other numerically, leaving the count unchanged.
Use the same method on your own generated reference. It is especially helpful when a failed drawing looks almost right at a glance: compare row alignment, run starts, run ends, and empty gaps before guessing which decorative change caused the problem.
| Core row | Filled column ranges | Dark-cell count |
|---|---|---|
| 1 | 1–7, 9, 12, 15, 17, 19–25 | 18 |
| 2 | 1, 7, 9–10, 19, 25 | 6 |
| 3 | 1, 3–5, 7, 9–10, 12–14, 17, 19, 21–23, 25 | 16 |
Our Digital Copy-and-Repair Check
We rendered the practice matrix with 12 pixels per module, dark cells on white, and the complete four-module margin. We then passed those pixels to jsQR 1.4.0 and required the exact original URL, not merely detection of a QR-like shape.
This deliberately severe failure isolates the role of the reference and structural patterns. It is not a damage-tolerance threshold, a handwriting success rate, or a comparison of phone cameras. The restored image is a deterministic digital reconstruction, not a photograph of repaired paper.
The useful habit is preserving a trustworthy source. When a handmade QR code fails, compare and restore the copied pattern rather than adding random squares until one scanner happens to react.
| Digital state | Exact URL recovered? |
|---|---|
| Unmodified reference matrix | Yes |
| All three 7×7 finder blocks replaced with white | No |
| Original matrix restored from the saved reference | Yes |
Test the Finished Hand-Drawn QR Code
First, inspect the object flat and under even light. Keep the entire square in the camera view. Watch for shiny ink, shadows from texture, faint pencil residue, and curled paper. These change the captured pixels even when the drawing’s intended grid is correct.
Then follow the complete result: decode the symbol, inspect the URL, open the page, and complete the intended action. Record the device, scanning app, distance, lighting, and any repositioning needed. Repeat on representative devices if other people will use the piece.
If a photograph decodes but the live camera struggles, the problem may involve focus, framing, or exposure. When neither works, compare the module grid and quiet zone. A visible URL followed by a failed page points to a destination problem. The scan troubleshooting guide separates those cases.
Repair a Handmade QR Code Systematically
Start at the first disagreement with the reference. Look for a whole row shifted one column, a dark run extended into a separator, or a grid stretched unevenly. Fix the identified defect, let the material dry, and repeat the same test conditions.
Opaque correction material may help on white paper, but it can leave glare, texture, or a new shade. A clean redraw is often easier to verify than multiple layers of repair. On cloth, wood, or painted material, test the process on a spare sample before committing the final object.
Error correction provides some recovery capacity, but it does not make arbitrary drawing errors safe. DENSO WAVE explains that raising correction also affects symbol size. More correction can mean more cells to draw. Copy accurately instead of budgeting an invented percentage of wrong squares.
Adapt the Pattern to Other Materials
For cross-stitch or embroidery, keep the effective cells square and inspect fabric stretch. For paint or stencil work, keep bridges and overspray from joining intended light spaces. For pencil, make dark areas sufficiently opaque and avoid a low-contrast gray result.
A handmade QR code on a gift may remain useful for years. Choose a destination you can maintain, and keep a readable backup address when practical. A managed dynamic destination can help when the target may change, though the redirect service must remain active.
For raised plastic rather than drawing, use the separate 3D-print QR guide. Physical relief, lighting, and material contrast introduce different constraints from flat ink on paper.
Conclusion: Make the Handmade QR Code Verifiable
A handmade QR code becomes a manageable project when you begin with a valid reference, reserve the complete border, copy short checked rows, and verify the finished piece. The numbered practice sheets, run-count method, and digital repair check give you concrete tools for that work.
Create your own reference with CraftMyQR, keep the original export, and approve the real material through actual scans. Use the practice sheets to learn the copying method, then regenerate the pattern for the destination your audience needs.
Frequently Asked Questions
Can a handmade QR code actually work?
Yes, when it faithfully reproduces a valid encoded pattern and remains readable to the scanner. Begin with a generated reference, preserve square cells and the complete quiet zone, and test the finished material rather than assuming accuracy.
Can I invent the squares myself?
An arbitrary arrangement will not encode your chosen URL. Generate the complete pattern first and copy it exactly. Manual encoding is a separate technical exercise involving data encoding, correction, placement, and masking rules.
What does the downloadable practice code open?
It encodes https://craftmyqr.com/. The numbered reference and blank worksheet are intended for copying practice. To open another destination, generate a new pattern for that exact URL and use it as your reference.
How much blank space should I leave?
For a standard QR code, reserve four module-widths on each side. If your cells are three millimeters wide, each margin is twelve millimeters. Keep labels, borders, grid guides, and surrounding artwork outside that reserved area.
Is higher error correction always better for drawing?
Not necessarily. It can increase the number of modules needed for the same data, which adds copying work. Choose a valid template, reproduce it accurately, and evaluate the finished object instead of relying on correction to hide mistakes.
Why does a correct-looking drawing fail to scan?
Possible causes include shifted rows, merged cells, damaged finder patterns, poor contrast, missing margin, glare, or curled material. Compare against the original grid and test a clear photograph before making random changes to the pattern.
Does the digital experiment prove my drawing will scan?
No. It checks exact payload recovery from deterministic pixels and demonstrates a structural failure followed by digital restoration. It does not measure marker bleed, paper texture, physical lighting, phone cameras, or your particular handmade object.
Can I change the destination after finishing the drawing?
A static drawing retains its encoded content. A stable URL can remain useful if you maintain its page or redirect, while a managed dynamic link can permit an authorized destination update without changing the drawn pattern.
Need to create a QR code now?
Create and preview your QR code with our free generator. For long-term materials like menus, packaging and posters, consider upgrading to dynamic QR codes.