
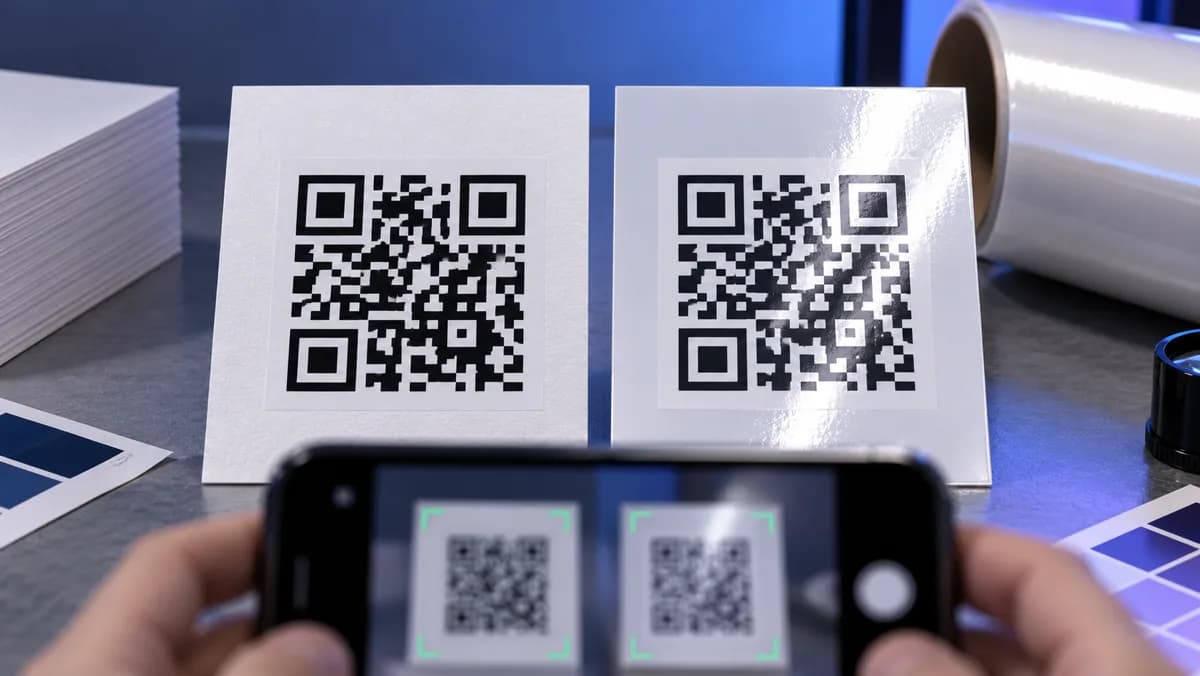
A QR code glossy surface problem is rarely caused by gloss everywhere at once. Failure usually appears when a bright reflection washes out finder patterns, modules, or the quiet zone from a particular light-and-camera geometry. Move the phone or material slightly and the same code may work again. That behavior is useful evidence, not randomness.
This guide turns glare into a controlled preflight. You will identify the reflection type, choose a finish or placement response, and test the final manufactured item across repeatable angles. Start with a clean, high-contrast symbol from the CraftMyQR QR generator, because surface treatment cannot rescue a weak source design.
Why a QR Code Glossy Surface Fails Selectively
A glossy laminate or varnish reflects light directionally. When the light source, material, and camera align, the camera receives a bright hotspot instead of the intended dark-and-light module pattern. The code underneath may be printed perfectly.
Three reflection patterns matter:
The first diagnostic is movement. Keep the code still and move the light; then keep the light still and tilt the item or phone. If the failed area moves with the reflection, finish and geometry are primary suspects. If the same modules remain broken at every angle, inspect print registration, scratches, missing ink, or source-image quality.
| Reflection pattern | What you see | Likely consequence |
|---|---|---|
| Small bright hotspot | White patch moves as angle changes | Local modules or one finder pattern disappear |
| Broad veil reflection | Whole code looks pale or milky | Contrast falls across most of the symbol |
| Linear streak | Bright strip crosses the package curve | Timing or alignment patterns become discontinuous |
Do Not Rely on Error Correction to Fix Glare
QR error correction can recover some unreadable codewords, but the commonly quoted percentages are approximate recovery capacity, not permission to cover the symbol. DENSO WAVE’s official error-correction explanation notes the tradeoff: higher correction increases restoration capability while also increasing the amount of data and symbol size.
A glare hotspot can be especially damaging when it removes a finder pattern or a continuous strip of structural information. The damage is also dynamic: the missing region changes as the viewer moves. That differs from a small, fixed blemish scattered through data modules.
Choose error correction for the overall use case, then prevent reflections through finish, placement, size, and testing. Do not shrink a denser high-correction symbol back into the same tiny label and assume the setting created free protection.
Protect Contrast and the Quiet Zone First
Gloss adds a changing light layer on top of the printed colors. Start with generous luminance separation so the design has margin to lose. Dark modules on a light, solid background remain the safest conventional polarity.
Preserve a four-module quiet zone around every side. DENSO WAVE describes that clear margin in its QR code implementation guidance. The quiet zone must use the same stable background, not transparent varnish over metallic artwork, photography, or patterned packaging.
Avoid reversed white-on-dark codes for uncontrolled consumer scanning. A specular highlight can merge light modules with the bright reflection, while some decoding paths already handle inverted polarity less consistently. Review the QR code color test for the separate roles of contrast and inversion support.
Use a matte patch for local control
A matte varnish knockout, matte laminate window, or opaque matte label can reduce directional reflection only where the code needs it. Extend the patch beyond the complete quiet zone. A patch ending at the module boundary leaves the margin exposed to the original gloss and nearby artwork.
Ask the printer whether “matte” describes the face stock, laminate, overprint varnish, or an uncoated knockout. Those constructions behave differently. Approve a production proof rather than selecting from a verbal finish name.
Reposition the code when form causes the streak
Curved bottles, tubes, pouches, and clamshells can concentrate reflections into bands. Moving the code away from the apex of a curve may improve geometry more than changing ink. A flatter panel also reduces perspective compression and focus variation.
Use the curved-surface QR guide when the symbol wraps around a cylinder. Gloss and curvature are separate variables, so test them separately before testing their combination.
Increase size when glare cannot be eliminated
A larger symbol does not remove a reflection, but it can keep a localized hotspot from consuming the same fraction of the code. Larger modules also tolerate focus and printing limits better. The tradeoff is layout area, so resize the complete symbol rather than trimming its quiet zone.
Change the lighting for controlled environments
Retail kiosks, museums, factories, and events may control fixtures. Diffuse light, change fixture position, or angle the sign so the expected camera path does not mirror the source. This solution is unsuitable for packaging that customers will scan under unknown lighting.
A Reproducible Glare Preflight Matrix
Many guides say “test in different lighting” without defining the test. Use a matrix that records the three-part geometry: light position, item orientation, and camera position.
Start with this minimum set:
Mark a trial as successful only when the exact payload appears and the resulting destination is correct. Record “required repositioning” separately from an immediate scan. A code that works after hunting for an angle may be acceptable for trained staff but poor for consumer packaging.
Photograph the failed geometry from beside the scanning phone. The image should show the reflection across the code, light source direction, material curve, and approximate camera angle. That evidence gives the printer or designer a specific problem to change.
| Variable | Test values |
|---|---|
| Light | overhead diffuse, directional front, directional side |
| Item tilt | 0°, 10° up, 10° down, 10° left, 10° right |
| Camera | straight, 20° left, 20° right |
| Distance | near, intended, far edge of use |
| Device | older representative phone, current iPhone, current Android |
| Sample | unlaminated proof, finished proof, production unit |
Use a One-Variable Proof Ladder
When the original fails, create a small proof sheet or sample set that changes one factor at a time:
This ladder reveals which intervention created the improvement. If you simultaneously enlarge the symbol, move it, change colors, shorten the URL, and add matte laminate, the final sample may work but you will not know which cost is necessary.
Archive the source artwork, exported QR image, print specification, proof photos, and result table. A supplier change or later packaging revision can then be compared with the approved baseline.
- Original design and original gloss.
- Same code and size with a matte patch.
- Same gloss with a larger code.
- Same gloss and size with a shorter encoded URL.
- Same construction with the code moved to a flatter or less reflective area.
- Best individual change plus the next most practical change.
Separate Finish Failure From Print Failure
Use these quick comparisons:
The QR code not scanning guide covers broader causes. Use it when changing the viewing angle does not move or remove the failure.
- Scans before lamination but not after: prioritize glare, laminate haze, or heat-induced distortion.
- Fails at every angle before lamination: inspect contrast, resolution, size, quiet zone, and payload density.
- Fails only after bending or application: inspect curvature, wrinkles, stretching, and adhesive placement.
- Works close but not at intended distance: enlarge the code or shorten the payload.
- Works when the phone tilts but not head-on: reflection geometry is strongly implicated.
- Opens the wrong page consistently: the image decoded; correct the encoded destination or asset mapping.
Packaging and Signage Handoff Checklist
A designer should hand the production vendor more than a QR image. Include:
Ask the vendor to return a finished, converted proof rather than a flat office print. Shrink sleeves, formed containers, laminated menus, and window decals can change after application. Scan the object in its final shape.
- The final vector or sufficiently large lossless symbol.
- Exact finished width and clear-module count.
- Required four-module quiet zone dimensions.
- Approved foreground and background colors.
- The intended laminate, varnish, stock, and metallic layers.
- A note that no spot gloss, foil, embossing, seam, or die-cut may cross the code.
- The target placement and orientation on the finished object.
- The approved proof sample and scan matrix.
- A human-readable fallback destination.
When a Glossy QR Is Still the Right Choice
Gloss may protect packaging, match the brand, resist moisture, or improve other artwork. The goal is not to ban it. The goal is to isolate a scannable area and preserve a fallback.
A small matte panel can look intentional when aligned with the call to action. On premium packaging, the QR may sit on an opaque paper seal or uncoated information label. On a glossy menu, a replaceable matte sticker can be easier to maintain than reprinting the whole surface.
For destinations that may change, a dynamic QR code prevents URL updates from forcing a new printed symbol. It does not correct glare, but it separates destination maintenance from material production and lets you keep the already tested visual asset.
What This Guide Adds Beyond “Avoid Glare”
The useful additions are operational: a reflection-pattern diagnosis, a three-part geometry matrix, and a one-variable proof ladder that reveals which intervention actually helps. The vendor handoff also connects digital QR requirements to laminate, varnish, foil, seams, and forming operations.
No synthetic overlay or software decoder can establish a universal gloss threshold. Real reflections depend on finish roughness, light size, source angle, curvature, camera exposure, and movement. The final manufactured item remains the required test specimen.
Conclusion: Control the QR Code Glossy Surface Geometry
A QR code glossy surface can work when the symbol starts with high contrast, keeps its full quiet zone, avoids high-risk placement, and passes a documented final-material test. Diagnose whether the problem is a moving hotspot, broad veil, or linear streak before changing the artwork.
Create and archive the source code with CraftMyQR, then use the preflight matrix on the actual laminated, varnished, or formed sample. A matte patch is often the cleanest local fix, but the evidence from your proof ladder should decide which combination of finish, size, payload, and placement belongs in production.
Frequently Asked Questions
Can a QR code work on a glossy surface?
Yes, but directional reflections can temporarily erase modules or finder patterns from the camera’s view. Use strong contrast, a complete quiet zone, suitable placement, and tests on the final finished item under representative lighting.
Is a matte QR label always better than gloss?
Matte usually reduces specular hotspots, but material quality, print sharpness, dirt resistance, and application still matter. Approve the exact face stock, laminate, adhesive, dimensions, and finished placement instead of relying only on the word “matte.”
How can I tell whether glare is causing the failure?
Move the light, item, or phone while watching the bright region. If the unreadable area changes with the reflection and the code scans at another angle, surface geometry is a strong cause.
Will higher error correction solve glare on a QR code?
Not reliably. Error correction can recover some damaged codewords, but a reflection may hide structural patterns or a concentrated region. Higher correction can also produce a denser symbol, so prevention and final-material testing remain necessary.
How far should a matte patch extend around the code?
The patch should cover the entire QR symbol plus its full four-module quiet zone. Additional visual breathing room can help keep adjacent glossy artwork, text, seams, and decorative effects away from the scanning area.
Should I put a glossy QR code on a curved bottle?
Avoid the tightest curve and strong reflection band when possible. Place the complete code on the flattest available panel, then test the filled and labeled production container from realistic distances and approach angles.
Does enlarging the QR code fix a reflection problem?
Enlargement can reduce the fraction covered by a small hotspot and create larger modules, but it does not remove broad glare. Combine size changes with better finish, placement, lighting, or a shorter payload as evidence requires.
What should I send the printer with the QR artwork?
Provide final dimensions, quiet-zone requirements, colors, finish and laminate specifications, forbidden effects, placement, approved proof results, and a fallback destination. Request a finished converted sample, not only a flat digital or office proof.
Need to create a QR code now?
Create and preview your QR code with our free generator. For long-term materials like menus, packaging and posters, consider upgrading to dynamic QR codes.